This is the first in a series of tutorials that explain how to use FDRTools. Quick start guide is for all photographers who have never used FDRTools before. Processing an exposure series and getting a result from it is demonstrated by means of a series of provided images. You can find further and more detailed information in the complete manual.
The installation procedure depends on the used operating system:
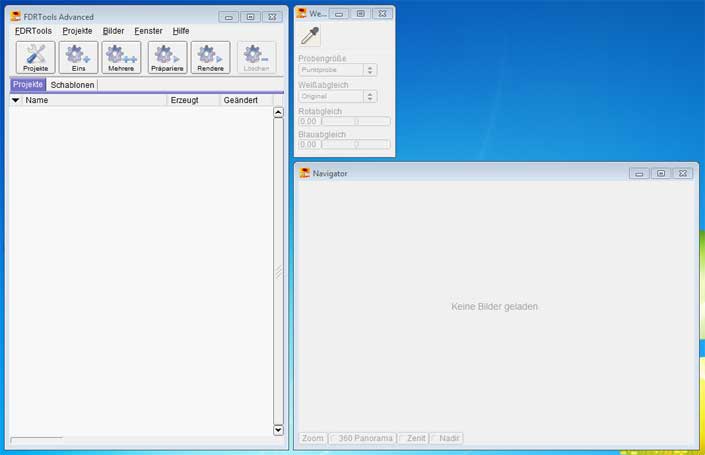
FDRTools is started like any normal Windows or Mac program. When starting it the first time the user interface looks like this:
|
|
| FDRTools user interface on initial start | |
Please note that FDRTools' user interface consists of several windows:
Main, Navigator/Preview windows are the most important ones. They should always be visible. You may show or hide individual windows via the Windows menu.
FDRTools were developped primarily for processing series of images but allow for processing a single image also, whereas it doesn't matter whether the image is a "real" HDR image, a RAW iamge, a TIFF file or a JPEG.
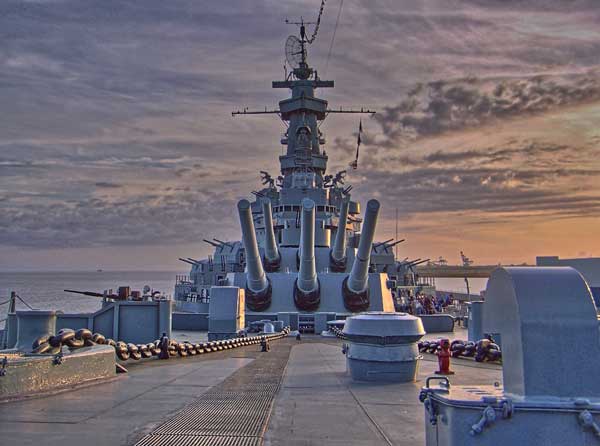
It is often intended to obtain a dramatising or even alienating effect when tone mapping a single image. The following section demonstrates how you can achieve this "HDR effect".
We provide a series of images for this tutorial that you can download from http://www.fdrtools.com/examples/tutorial.zip. Extract these images to a directory of your choice.
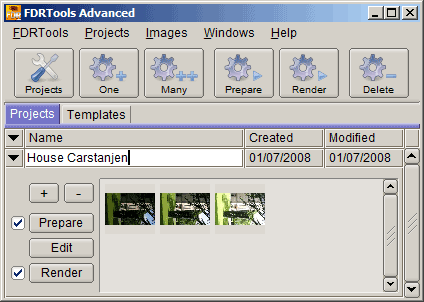
FDRTools start in project management view. A project consists of one or several images and the accompanying processing settings. Projects are saved when exiting the program and are reloaded with the next program start.
| FDRTools main window - project management view | ||
By pressing the One button we are now going to create a single new project. The file choosing dialog shows up. Navigate to the directory with the example images and choose data type Generic TIFF. Choose the image battleship.tif and press the Open button. A project is created.
 |
||
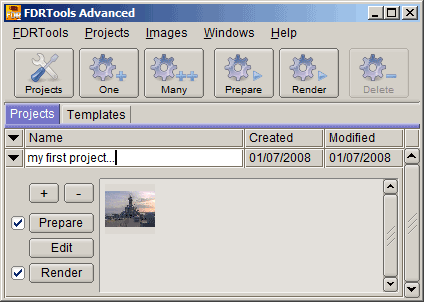
| FDRTools main window - project overview with a single project | ||
You should give a speaking name to your project as can be seen in the example project. By pressing the Edit button the program switches to the editor view, at the same time hiding the project view.
The toolbar functions Alignment and HDRI Creation have a meaning only when processing a series of images; they are not of interest at this point. Switch to the Tone Mapping module straight away.
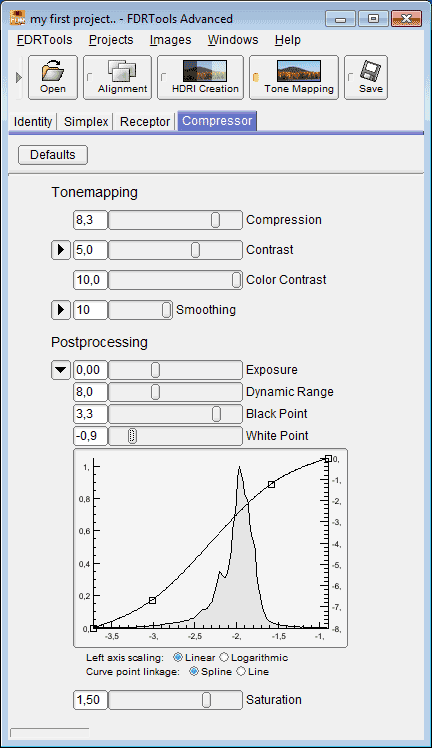
FDRTools offer four tone mapping methods. By far the most important tone mapper is named Compressor. It allows for contrast enhancing as well as dramatising effects. The other methods are useful primarily with exposure series.
 |
||
| FDRTools main window - processing a single image | ||
Images -> Save as... saves the result. First you determine the file format that shall be used to save the resulting image. Here we have chosen 'JPEG'. Name the result and confirm. Now the Save image dialog shows up. Start the image generation by pressing the Save button.
 |
||
| The Save image dialog |
 |
||
| The result |
For this tutorial we provide a set of images that you can get from http://www.fdrtools.com/examples/tutorial.zip. Extract the images to a directory of your choice.
FDRTools start in project management view. A project consists of one or several images and the accompanying processing settings. Projects are saved when exiting the program and are reloaded with the next program start.
| FDRTools main window - project management view | ||
By pressing the One button we are now going to create a single new project. The file choosing dialog shows up. Navigate to the directory with the example images and choose data type Generic JPEG. Choose images 0.jpg to 2.jpg and press the Open button. A project is created.
 |
||
| FDRTools main window - project overview | ||
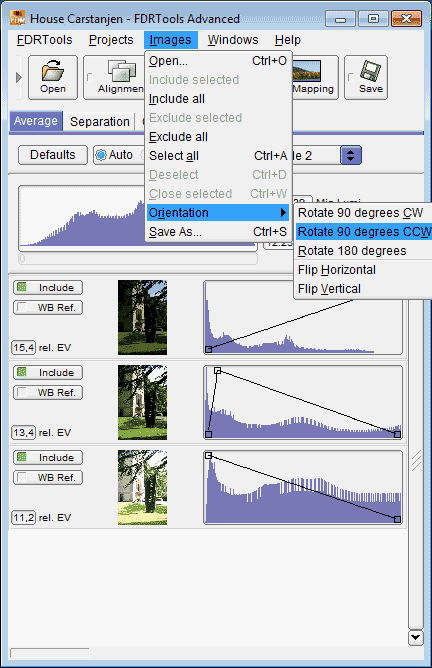
Press the Edit button to open the project with the editor. The exposure series is loaded to the editor for processing. Choose Images -> Orientation -> Rotate 90 degrees CCW to give the images the right orientation.
 |
||
| FDRTools main window - project editor view | ||
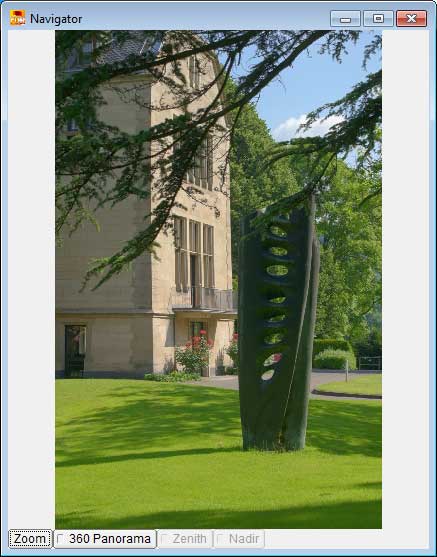
The images are processed automatically using default parameters. The intermediate result is then shown in the Navigator window.
 |
|
| FDRTools Navigator window |
Automatic processing comprises the following steps:
When automatic processing is finished you can refine the settings and adapt the result to your taste.
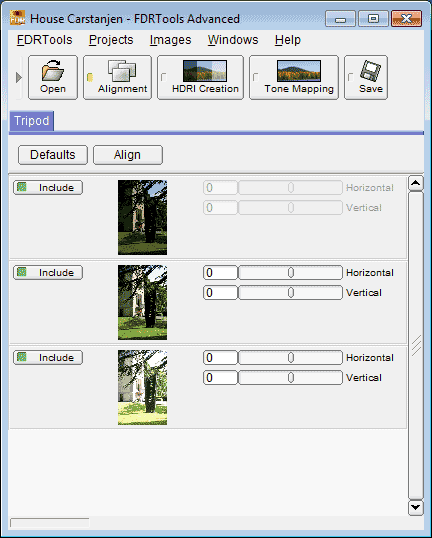
When taking bracketed exposures there is a chance that the single exposures are somewhat misaligned, even if you use a tripod. This can be caused by wind, shutter vibration or micro movements of the tripod. Module Alignment helps in correcting such shifts.
 |
||
| Alignment module Tripod |
The example series was captured using a tripod. Automatic alignment can not detect horizontal or vertical shifts hence there is nothing to align here. This is not always the case. Often there will be positive or negative numbers visible in the image alignment layers of the Tripod module.
You can adapt the results of automatic alignment if necessary. The results of changed alignment parameters are displayed in the Navigator window.
HDRI Creation serves to the merging of differently exposed photos to one homogeneous image, the HDRI (high dynamic range image).
FDRTools offer several methods for HDRI Creation named Average, Separation and Creative, each of which is specialised in some aspects.
Average is the method of choice as long as the scene has no moving objects like people, cars etc.
The Separation method in many cases allows to avoid so called "ghosts" caused by moving objects and can reduce artefacts caused by slightly misaligned images. Separation also yields optimal results in the shadow and highlight regions of a scene.
While Average and Separation are specialised in merging exposure series of a statically illuminated scene, the Creative method allows for seamless merging of any kind of imagery, especially images with changing lighting in terms of position, intensity and spectrum of the light sources. The result of the blending procedure can be steered in a very flexible way. See chapter Creating HDR images for more information on Creative.
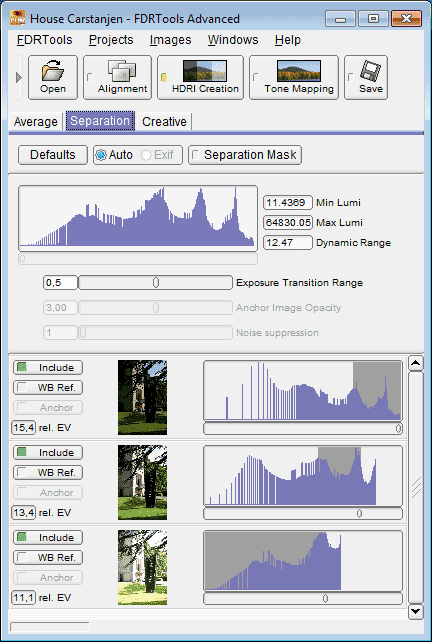 |
||||
| The HDRI Creation dialog | ||||
By compressing tonal values Tone Mapping maps a HDR image with high dynamic range to an image with a dynamic range that can be reproduced completely on any monitor or printer. Lots of tone mapping methods have been invented, each of them producing characteristic results.
In the main window choose the Tone Mapping dialog and then one of the methods Receptor or Compressor. For this tutorial the parameters were adjusted as follows:
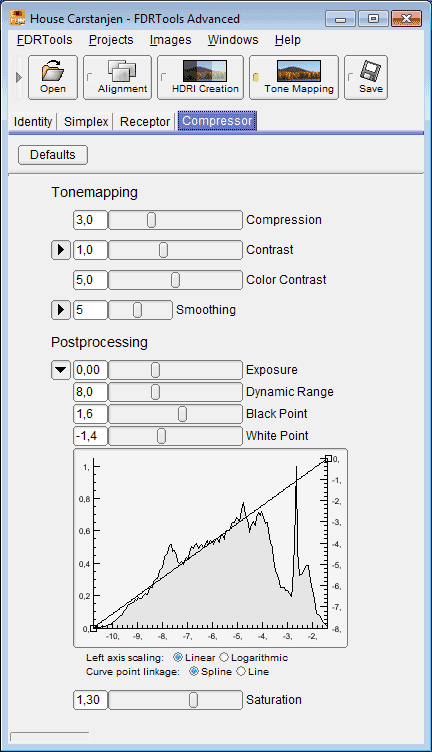 |
|||
| The Tone Mapping dialog | |||
The tone mapped image is displayed in the Navigator window.
By means of tonal value compression we have converted an HDR image into a contrasty image that shows all details of the scene and is suited for display on conventional media like monitor or photographic paper.
Images -> Save as... saves the result. First you determine the file format that shall be used to save the resulting image. Here we have chosen 'TIFF 16'. Name the result and press the Save button. Now the Save image dialog shows up. Start the image generation by pressing the Save button.
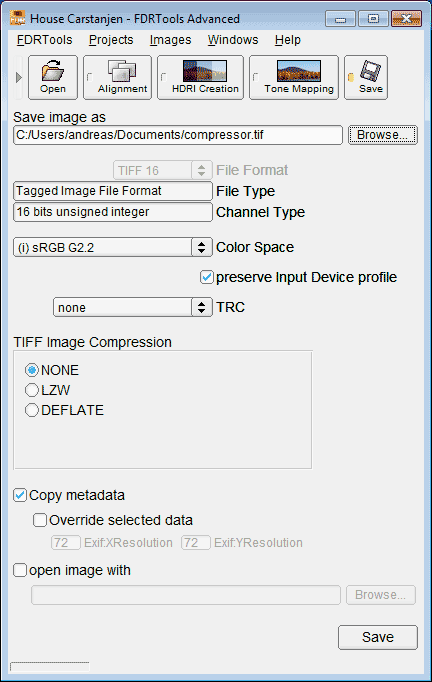 |
||
| The Save image dialog |
The following images show the results. Both images were created using the Average HDR creation method and then tone mapped with methods Receptor resp. Compressor.
 |
 |
||
| Result Receptor | Result Compressor |