1 Introduction
This guide is made for all photographers unfamiliar with FDRTools.
It wants to show in simple steps what FDRTools can do for you.
You need neither a camera nor images for this tutorial.
2 Installation
For installation double click the FDRTools installer file.
An assistant will guide you through the installation process.
After the installation is completed start FDRGui.
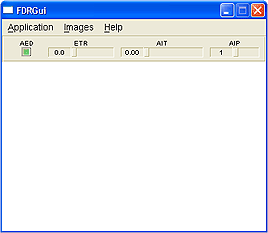
The following window appears:
| |
 |
| |
The FDRGui main window |
3 Preferences
Please choose menu item 'Application -> Preferences' now.
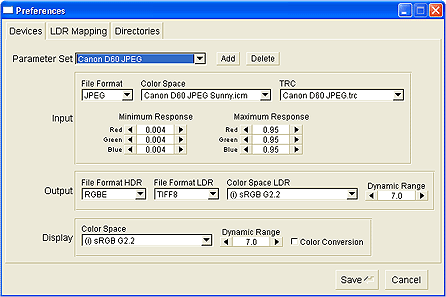
The following window will appear:
| |
 |
| |
The Preferences window |
Configuration of these parameters is the first step for successful application of FDRGui.
I want to give a brief introduction here without touching details.
All fields are filled with sensible values.
You don't need to change anything.
3.1 Devices
Merging a series of differently exposed images into a single image is a major task for FDRGui.
This can only be managed if the program knows the essential characteristics of the used devices.
The reason I speak of devices is because FDRGui reads images from different input devices (generally cameras) and it writes images for different output devices (displays, printers).
Configuration of these data is done within the 'Input' and 'Output' frames.
The characteristics of the used display (frame 'Display') are also important to ensure correct display of image data during processing.
A combination of input device, output device and display can be combined to form a 'Parameter Set'.
A 'Parameter Set' symbolises a working environment.
So far a brief introduction to FDRGui's parameterisation.
The tabs 'LDR Mapping' and 'Directories' are not that important at the moment.
Maybe I should mention that all settings made under 'Preferences' have an effect elsewhere in the program.
Therefore they should be reasonable to some degree.
Please close the 'Preferences' with the 'Cancel' button.
4 HDR Construction
We want to read the prepared example images now.
To do so open the image file chooser with the menu item 'Images -> Add'.
Navigate to the directory 'Program Files -> FDRTools -> Images'.
Choose file type 'Canon D60 JPEG'.
Choose all the images and press the 'OK' button.
FDRGui loads the images.
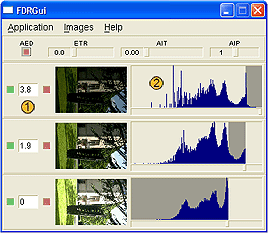
The images appear as layers in the main window:
| |
 |
| |
The image layers in the main window |
4.1 Layers
Of all the main window's information and adjustment capabilities currently only the following elements within a layer are of interest:
-
Relative Exposure. FDRGui calculates the image's relative exposure values.
The unit used for that is the exposure value EV.
A value of 0 is arbitrarily assigned to the lightest image (2.jpg).
The exposure values of the example images are 1.9 (1.jpg) and 3.8 EV (0.jpg) respectively.
Notice: I have done the images with the AEB (Auto Exposure Bracketing) functionality of the Canon D60, adjusted to -2, 0, +2 EV.
So the displayed values match the expected values fairly good.
-
The Histogram. Here the luminance distribution of the image is shown.
FDRGui uses the relative exposure values to correct the image's luminance values so that each histogram aligns with the others.
So: the 1.jpg histogram is shifted by 1.9 EV to the right relative to 2.jpg's histogram.
Accordingly the 0.jpg histogram is shifted by 3.8 EV relative to 2.jpg's histogram.
 |
|
Good alignment of the histograms and good congruence of their shapes is important for HDR image quality.
|
In our example both criteria are fulfilled as much as possible:
Naturally 1.jpg and 2.jpg lack increasing parts of the scene spectrum because of overexposed pixels.
On the other hand the left side of the spectrum of 1.jpg and 0.jpg is increasingly 'frayed' by noisy pixels.
FDRGui now selects a part of the spectrum from each image and creates the HDR image.
These parts are colored dark and can be changed with the small slider below each of the histograms.
4.2 Navigator
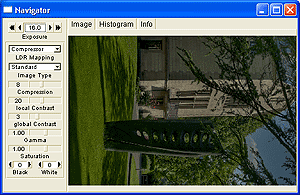
The HDR image is displayed in the 'Navigator' window which shows up shortly after the main window.
To see more of the image you can enlarge the Navigator:
| |
 |
| |
The Navigator window |
Probably the HDR image appears dark on your monitor.
The reason for this is that our 'camera' is adjusted to a high 'exposure value' and can display only a part of the scene dynamic range.
I'm talking of 'camera' and 'exposure value' here because the following analogy suggests itself:
the HDR image is a reconstruction of the visible light of the scene at the moment of image capturing (in case the darkest image has no overexposed pixels and the lightest image doesn't contain noisy pixels).
Now the HDR viewer integrated in the Navigator can be compared to a camera being adjusted to a certain exposure value and capturing a part of the real spectrum.
To verify this analogy compare the Navigator image with the thumbnail of 0.jpg in the main window.
Both images look nearly identical.
Now adjust the 'Exposure' regulator to a value of 12.2.
The image now looks much lighter, the sky is 'overexposed'.
Compare the Navigator image with the thumbnail of 2.jpg.
Again both images look nearly identical.
Please switch to the 'Histogram' view now.
Here the scene spectrum is displayed in the channels Luminance, Red, Green and Blue.
The Luminance spectrum shows a dark colored area shifting along the spectrum in response to changes of the 'Exposure' controller.
This area symbolises the currently visible part of the scene spectrum.
4.3 Preview
Now switch to 'Image' view again and click the image.
The 'Preview' window opens up allowing to simply check the quality of the created image.
You can zoom with the '+' and '-' keys and change image detail by dragging the mouse with pressed left button.
The adjustment of the 'Exposure' controller impacts both the Preview and the Navigator in the same way.
5 HDR Compression
Switch to 'Histogram' view.
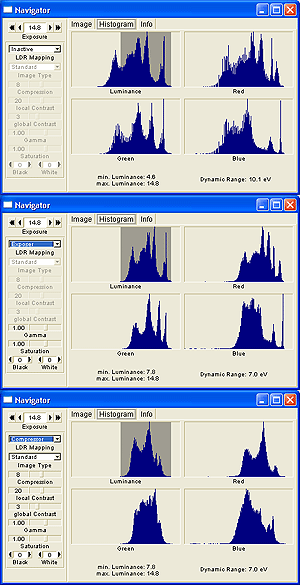
The bottom shows the minimal and maximal luminance and the dynamic range of the scene.
Adjust the exposure controller to the maximal luminance value.
Now switch the 'LDR Mapping' menu from 'Inactive' to 'Exposer' and then to 'Compressor'.
The 'Exposer' mapping compresses the spectrum to a dynamic range of 7.0 EV.
This complies with the output device dynamic range which can be configured under 'Preferences'.
The 'Compression' setting also compresses the spectrum to a dynamic range of 7.0 EV.
But compared to the 'Exposer' setting also the shape of the spectrum changes significantly.
| |
 |
| |
The different 'LDR Mapping' methods |
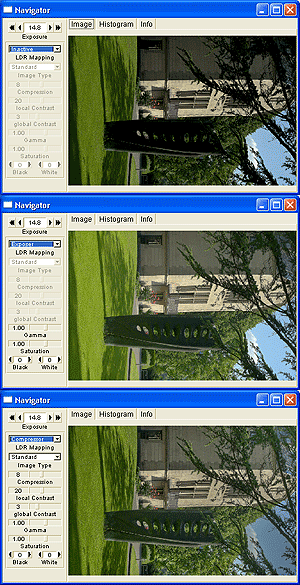
Switch to 'Image' view now and in the same way switch the 'LDR Mapping' menu from 'Inactive' to 'Exposer' to 'Compressor'.
The 'Exposer' setting has the effect of lightening dark image parts previously invisible.
An other effect is a decrease of contrast.
The higher the scene dynamic range the stronger this effect will be.
The 'Compressor' setting also lightens dark image parts previously invisible.
However, different from the 'Exposer' setting image contrast looks much more natural here.
The 'Compression' slider is of particular importance.
It facilitates to adapt the dynamic range compression so that for the human eye the scene looks natural.
For the example image I have chosen a value of 8.0.
| |
 |
| |
The different 'LDR Mapping' methods |
With the 'local Contrast' and 'global Contrast' sliders the image contrast can be regulated if necessary (in most situations it is not though).
Also important for the visual impression are the 'Black' and 'White' controllers, allowing for adjustment of black point and white point respectively.
6 Exposure
This finishes all settings and we can save our image.
Or, staying with the camera analogy: the exposure settings are finished and we can expose the image now.
The 'Release Button' of our camera is the menu item 'Images -> Expose' opening up the 'Expose' window.
In the 'Expose' dialog choose a file name for the HDR image and for the LDR image.
This generates the command sequences for FDRExposer and FDRCompressor respectively.
With 'Run' you then start the generation of your image.
| |
 |
| |
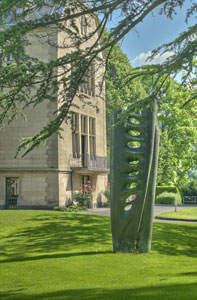
The final result |
End.
Do you have questions or suggestions? If so you may want to publish them on the Forum.
|
